
You pull the cover off your boat, and the seats look worse than you remember. There's sunscreen worked into the grain, dark spotting near the piping, and a musty smell when you lift a cushion. The temptation is to grab a strong cleaner and scrub until everything looks white again.
That's usually the wrong starting point. Learning how to clean boat upholstery means identifying the material, using the least aggressive treatment that works, and making sure the cushion underneath dries. A bright seat with wet foam inside isn't a finished job.
Table of Contents
- Identify Your Boat Upholstery Before You Clean
- Routine Cleaning for Vinyl and Canvas, Step by Step
- Removing Mildew and Set-In Stains Without Damage
- Drying Boat Upholstery and Avoiding Mistakes That Bring Mildew Back
- Deciding When to Hire a Professional Boat Detailer
Identify Your Boat Upholstery Before You Clean
What is the upholstery made of? Run your fingertips across an inconspicuous area and look closely at its surface. Marine vinyl usually feels smooth or embossed, looks slightly glossy, and has a protective finish. Canvas has visible woven threads and a matte appearance, while leather feels supple and may show natural grain variation.
Appearance alone isn't proof. Some synthetic upholstery closely resembles leather, and coated fabrics can look like ordinary canvas. Check the care tag before choosing a specialty cleaner.
Match the Cleaner to the Material
Upholstery material, safe cleaner and what to avoid
| Material | How to Spot It | Safe Everyday Cleaner | Avoid |
|---|---|---|---|
| Marine vinyl | Smooth or grained, slightly glossy, UV-coated | Mild soap, warm water, soft cloth | Ammonia, abrasive pads, pressure washing |
| Marine canvas (solution-dyed acrylic) | Woven, matte, on bimini tops and cushion covers | Mild soap, soft-bristle brush, freshwater rinse | Solvents, machine washing, water above 100°F (38°C), as described in Sea Ray's canvas-care guidance |
| Leather | Supple, natural grain, premium seating | pH-balanced leather cleaner on a damp cloth | Silicone-based dressings, harsh solvents |
| Foam cushion core | Sponge-like interior under the cover | Dry-vacuum loose debris, no soaking | Saturating with water, enclosing while damp |
The important distinction is nonporous versus porous. Intact vinyl lets you remove most surface dirt by wiping; woven fabric and foam can hold water, odor, and contamination internally. Even a vinyl-covered cushion has vulnerable stitching holes and openings underneath.
Marine-vinyl care prioritizes preserving its protective finish, not achieving maximum whiteness. Upholstery Supply USA's marine-vinyl guidance supports mild cleaning rather than abrasive tools and aggressive chemicals that can damage that finish.
Practical rule: Treat the entire cushion as a water-sensitive assembly, even when its outer cover wipes clean.
Don't transfer your automotive routine straight onto the boat. Strong all-purpose sprays, slippery dashboard dressings, and pressure washers aren't substitutes for material-specific care.
If identification is uncertain, look beneath the seat for a manufacturer tag or check the owner's manual. Start with mild soap on a hidden spot, wipe it clean, and inspect it after drying before treating a visible panel.
Routine Cleaning for Vinyl and Canvas, Step by Step
A cushion can look clean on top and still hold moisture beneath the cover. Start with controlled washing and finish by exposing the upholstery until it is dry. For routine vinyl care, Mercury Marine recommends gentle soapy water and a soft rag after every use, followed by a thorough freshwater rinse. Regular washing removes sunscreen, sweat, and fish residue before they build up.
Set out a soft vacuum attachment, microfiber towels, a soft-bristle upholstery brush, mild soap, and separate containers for washing and rinsing. Choose soap without bleach, degreaser, or polishing ingredients. Work in shade when possible, with upholstery cool to the touch.
Wash Without Flooding the Cushions
Remove loose debris. Vacuum crumbs and sand with a soft attachment, or brush them away gently. Clear cushion gaps so wet grit does not turn into abrasive paste.
Rinse surface contamination. Use controlled freshwater flow to remove salt and dust. Near openings, damaged stitching, or fixed cushions, use a clean damp towel for better control.
Mix mild soap and warm water. Use enough soap to loosen soil without making heavy foam. Keep canvas wash water comfortably lukewarm. Clean small sections with a soft cloth, following the surface texture.
Detail the seams separately. Lightly brush piping, stitching, and creases while supporting the cushion. Avoid pressing dirty water into seam openings or stressing weakened thread.
Let canvas soap dwell briefly. Keep the soap wet while it loosens soil, and follow any shorter dwell time on the product or manufacturer label. Sun or wind can dry the solution quickly, so shorten the section you are working on if needed. Agitate gently.
Remove all soap. Rinse until suds are gone and runoff is clear. Where rinsing with a hose could soak the cushion, make repeated passes with clean, damp towels. Change the rinse water when it turns cloudy.
Towel-dry, then air-dry. Blot standing water with a clean microfiber towel, especially around piping. Leave the upholstery exposed until the fabric and concealed surfaces are dry.
Use the same sequence each time. Keeping the work area small makes it easier to remove soap before it dries into streaks.
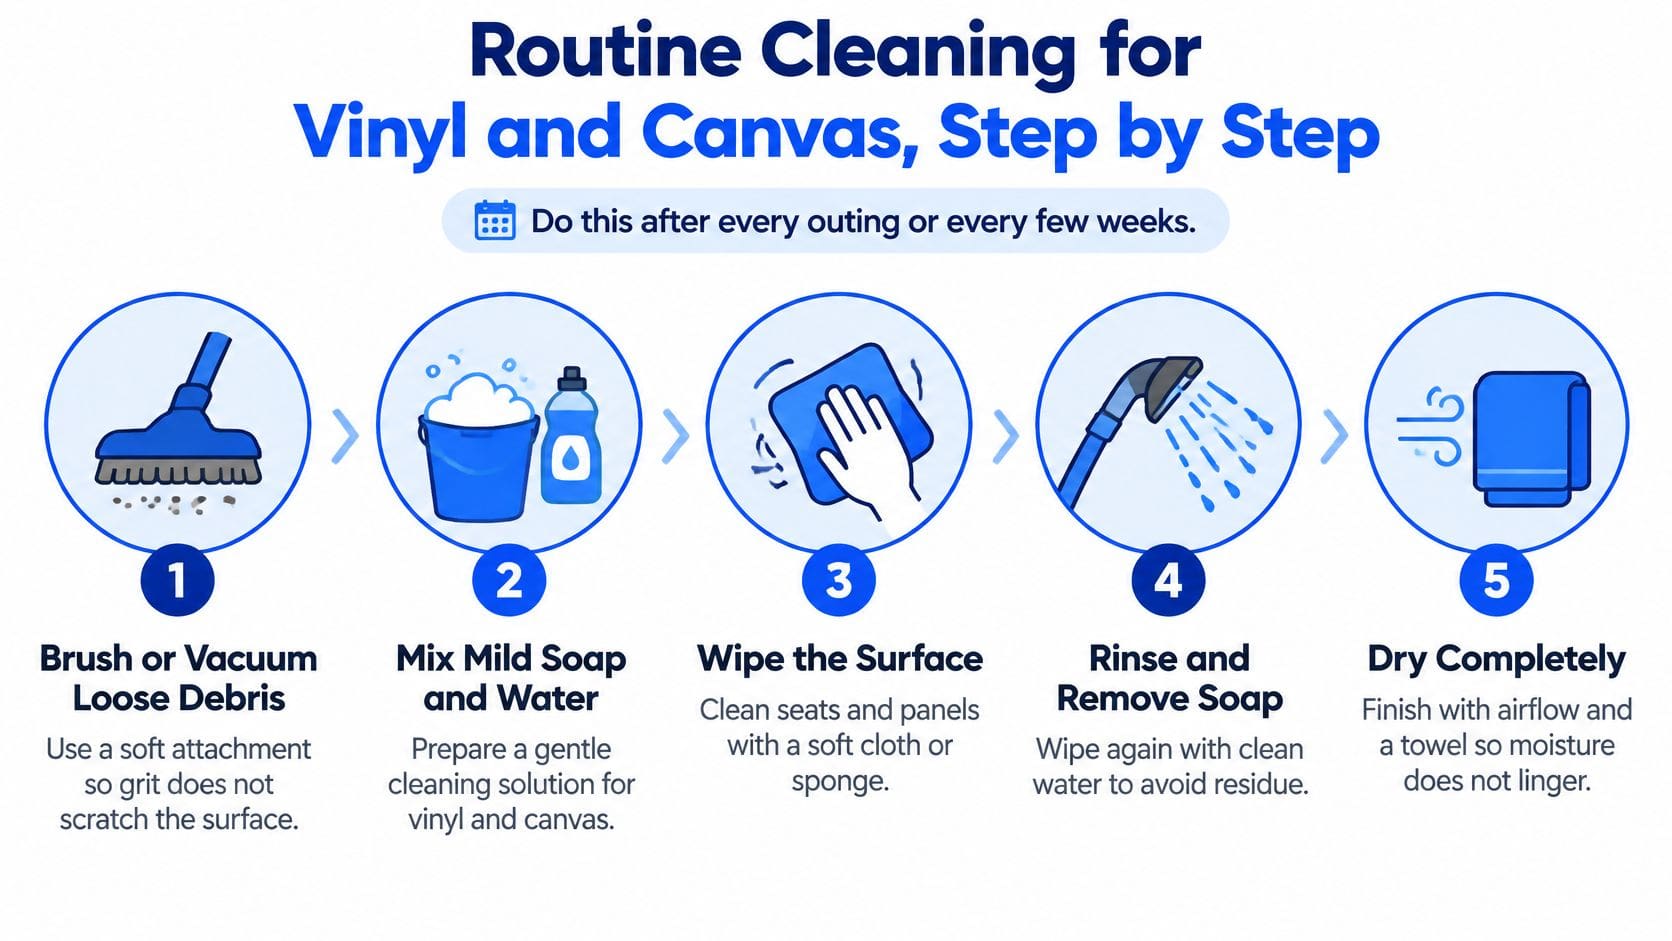
Direct sun can dry soap before you remove it. Move the boat into shade when practical, or clean the shaded side first rather than adding more cleaner.
Give Leather Its Own Cleaning Pass
Leather needs a different routine from vinyl. The material-first methods in this car-interior cleaning guide also apply to careful product use, though boat seating still needs controlled moisture.
- Brush away grit with a soft brush.
- Apply pH-balanced leather cleaner to a soft cloth, not directly to the seat.
- Work lightly in small sections along the natural grain.
- Wipe away residue with a clean, barely damp cloth.
- Towel-dry, then let the leather air-dry before use.
Clean vinyl should have even color and no tacky film. Leather should look supple, not greasy. Canvas may need a compatible fabric treatment if its water repellency has worn down; cleaning alone will not restore that finish. Keep silicone dressings off leather seating.
Removing Mildew and Set-In Stains Without Damage
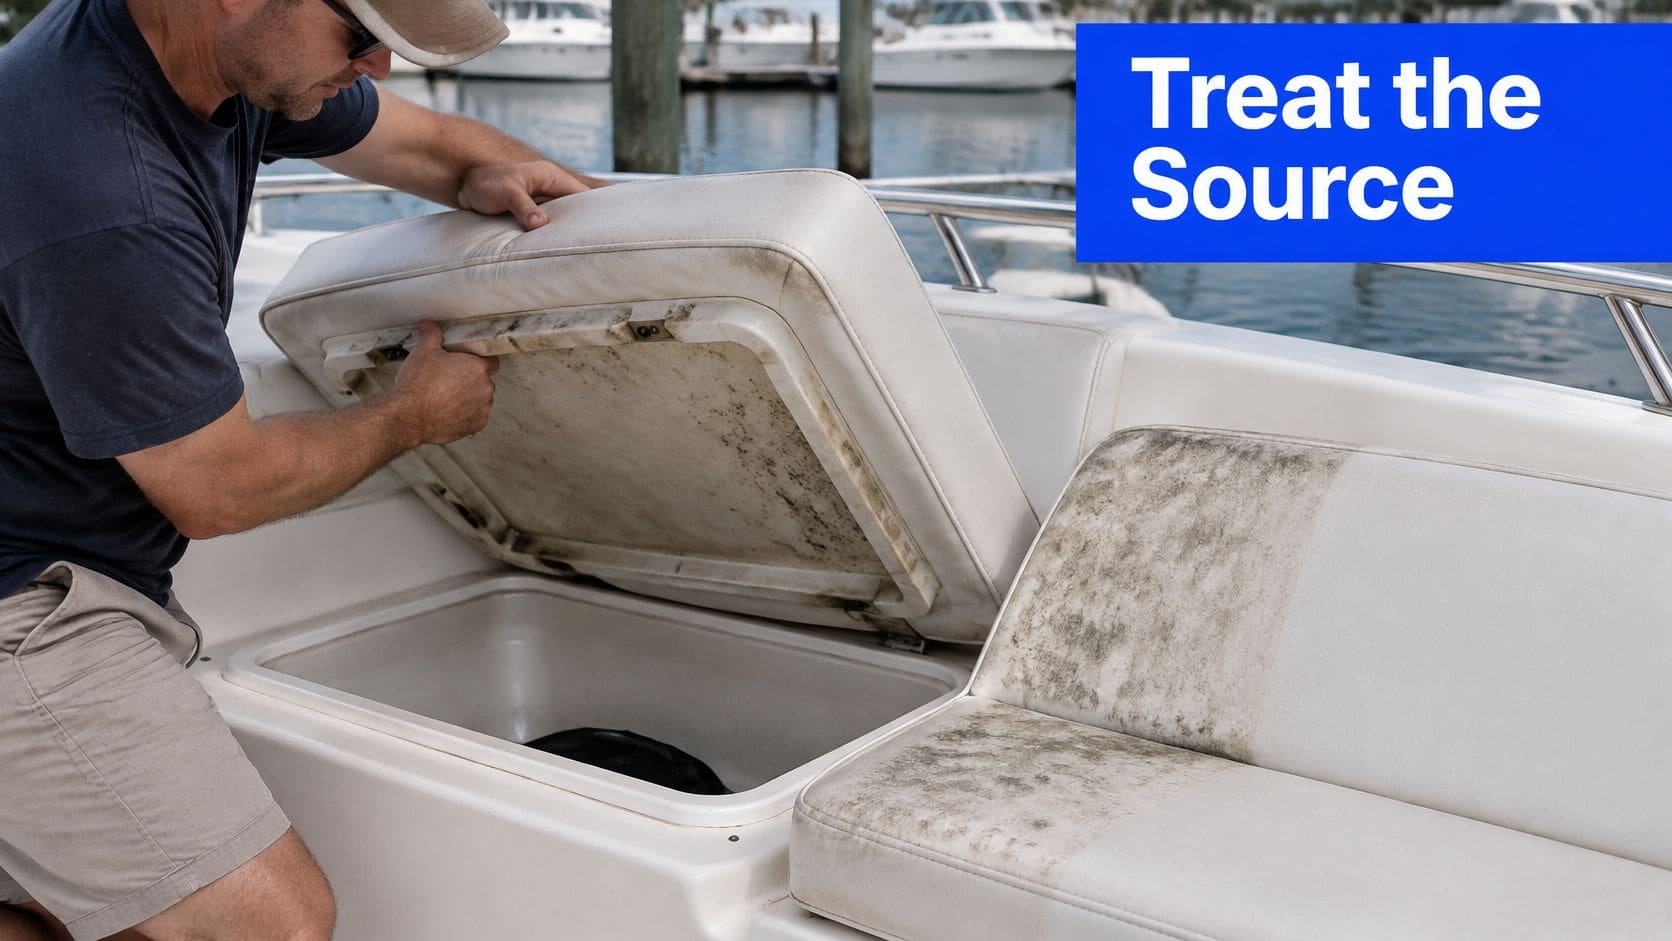
Mildew around a cushion edge often means you need to inspect beneath the seat, not just treat the visible dots. Remove cushions where possible, open storage compartments, and check the backs, mounting surfaces, and drainage areas.
The underside may reveal why the surface stain keeps returning.
Escalate the Cleaner, Not the Scrubbing Pressure
For ordinary loose debris, use a soft vacuum attachment before wet cleaning. Don't dry-brush substantial mold growth into the air; isolate badly affected cushions and get a professional assessment instead.
Test your chosen cleaner on a concealed area, then examine it for discoloration, tackiness, or dye transfer after drying. Apply only enough solution to wet the affected surface, and use light agitation around textured grain, piping, and cushion edges.
Chickamauga Lake Canvas's upholstery-care guidance describes label-directed dwell periods commonly around 10–15 minutes, followed by residue removal and thorough drying. That's a treatment window, not permission to leave every product on every material that long; a shorter manufacturer limit takes priority.
Stain and mildew treatment by problem
| Problem | First Treatment | If It Persists | Avoid |
|---|---|---|---|
| Surface mildew on vinyl | Mild soap, soft brush, 10 to 15 minute dwell only where permitted | Marine-approved mildew cleaner; dilute bleach only if the manufacturer allows | Undiluted bleach, hard scrubbing |
| Mildew on canvas | Mild soap, soft-bristle brush, 15 minute dwell where permitted | Repeat the gentle wash, then dry fully before judging | High-pressure spray, machine washing |
| Sunscreen and body oils | Mild soap on a soft rag | Dedicated marine-vinyl cleaner with a short dwell | Gasoline-based solvents, heat |
| Fish slime and blood | Freshwater rinse, then mild soap | Marine-vinyl cleaner, rinsed completely | Hot water, stiff brushes |
| Colored drink or ink | Mild soap as soon as possible | Marine-vinyl cleaner, then full rinse | Letting it dry overnight, bleach |
Bleach Isn't a Universal Boat Cleaner
Some marine manufacturers prohibit bleach because it can damage vinyl and stitching. Certain removable-canvas procedures permit a diluted mixture, but that doesn't make the same treatment safe for an assembled seat.
Check both the upholstery instructions and the cleaner label. Wear the specified protective equipment, ventilate the area, and never mix bleach with ammonia or other cleaners. A bottle labeled marine still needs a compatibility check.
A stain disappearing tells you about appearance. It doesn't prove that the cushion interior is clean or dry.
After treatment, inspect for returning dark patches, seam wicking, lingering odor, and sticky areas. Cleaning may improve a permanent stain without eliminating it, and contaminated foam may need replacement. Continuing to scrub after the finish starts changing trades a cosmetic problem for material damage.
Drying Boat Upholstery and Avoiding Mistakes That Bring Mildew Back
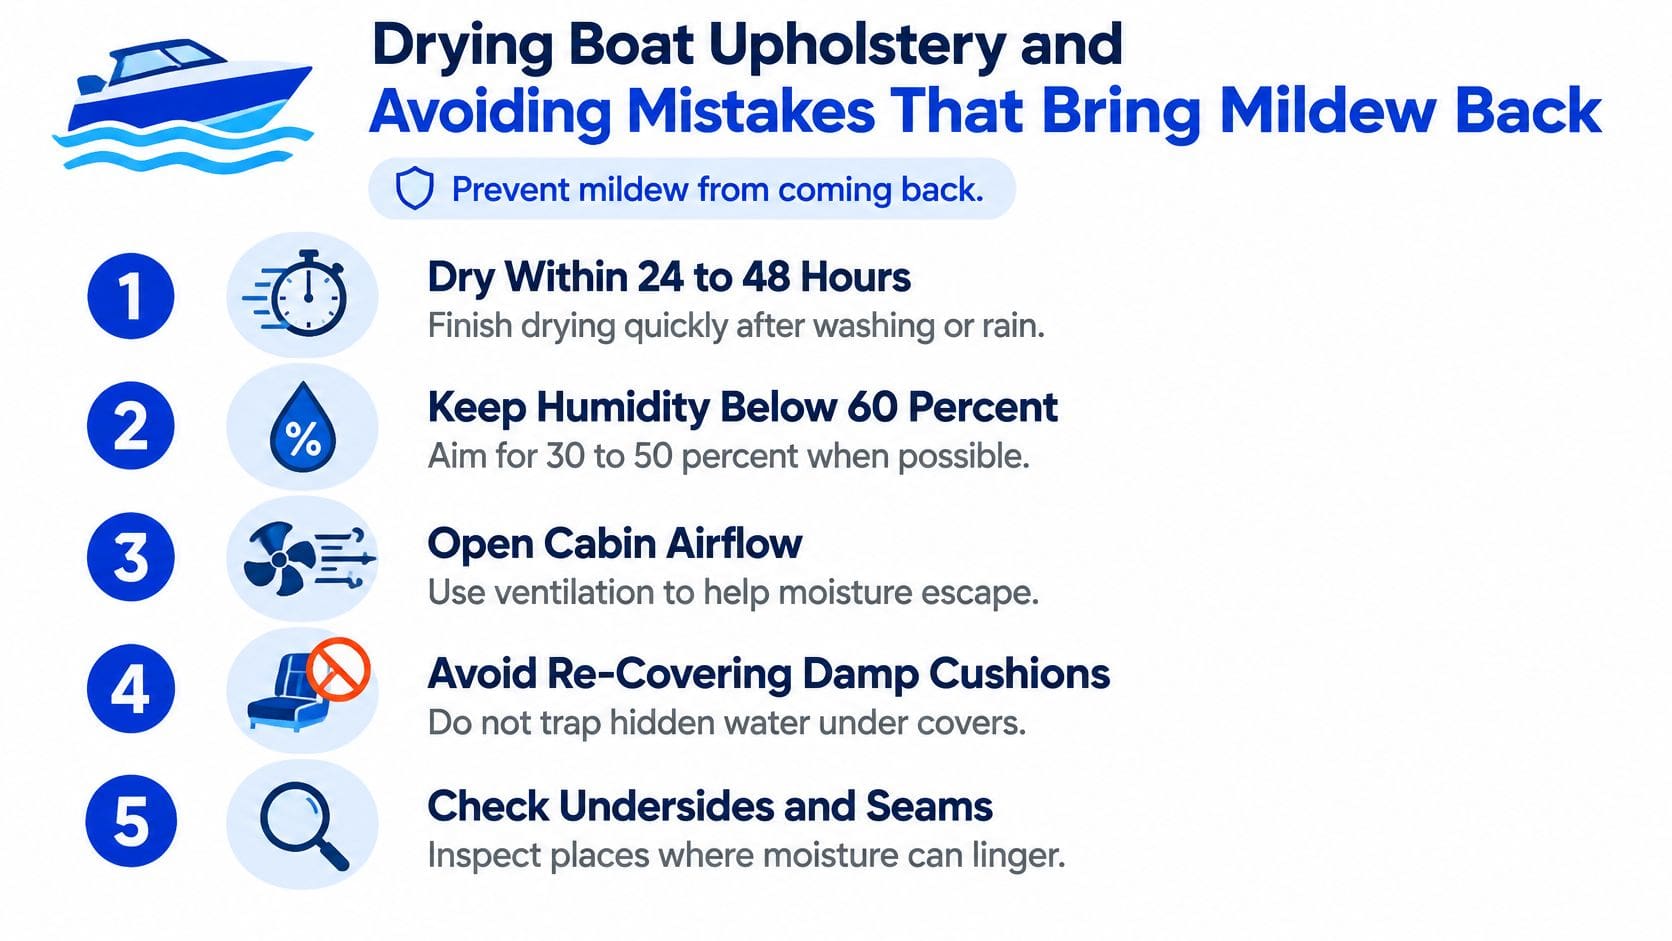
Start drying immediately after washing or rain exposure. The U.S. Environmental Protection Agency's mold and moisture guidance recommends drying water-damaged items within 24–48 hours whenever possible and maintaining relative humidity below 60%, ideally 30%–50% where practical.
Those are general moisture-control targets, not a guarantee that a soaked cushion will become safe merely because its surface dries within that window. Thick foam, enclosed seat bases, and humid weather can make drying much harder.
Move Water Out Before Adding Airflow
Remove standing water first. Empty storage recesses and blot pooled water rather than expecting a fan to evaporate everything. Check that drains are open and that runoff isn't collecting beneath the seat base.
Lift and support cushions. Stand removable cushions on edge using clean, stable supports so air reaches the backs and undersides. Don't stack them or lean wet faces tightly together.
Draw out retained moisture. Blot seams and piping with a dry towel. If a cushion releases water when pressed, surface wiping isn't enough; suitable extraction equipment or professional drying may be needed.
Create a path for moisture to leave. Position fans to move air across exposed surfaces and out of the boat. In an enclosed cabin, a dehumidifier can remove moisture from the air rather than circulating humid air around it.
Inspect the source of the wetness. Look for leaking canvas, failed seals, wet compartment liners, and condensation. Repairing the leak matters more than repeatedly washing the stain beneath it.
Use electrical equipment only with suitable protected power and dry connections. Don't leave household fans or dehumidifiers exposed to rain or spray.
The drying checklist makes the hidden areas harder to overlook.
Avoid the Shortcuts That Create Another Cleaning Job
A pressure washer can make a seat look clean quickly while driving water through stitching and into foam. Crestliner's vinyl-maintenance guidance specifically warns against power washers, ammonia-containing household cleaners, and bleach. A gentle repeat application is usually a better escalation than more pressure.
Other shortcuts create problems that aren't immediately visible:
- Soaking the cushion. More water doesn't necessarily remove more dirt. It can carry contamination deeper into absorbent components.
- Using automotive dressing. Silicone-rich dashboard sprays can leave seating slippery and oily. Buy a seating-compatible marine protectant instead of choosing by shine.
- Skipping the hidden test. Inspect the dry test area under good light. A wet surface can temporarily conceal dulling or color change.
- Applying protection too soon. Don't coat damp or contaminated vinyl. A protectant isn't a drying aid or a substitute for removing residue.
- Closing an airtight cover. Plastic tarps and poorly ventilated coverings restrict evaporation. Use a supported, ventilated boat cover and keep its vents unobstructed.
For Hilliard and Columbus owners preparing for seasonal storage, choose a cleaning day that leaves room for drying and inspection. Don't schedule the wash immediately before the boat must be closed up and put away. This boat-detailing and protection guide can help you plan the upholstery work alongside the rest of the boat.
Before storage: Leave time for the drying job, not just the washing job.
Check Before the Cover Goes On
Keep a small onboard kit with clean microfiber towels, mild soap, and a soft brush. A freshwater wipe after an outing removes residue before it becomes stubborn buildup, while routine canvas care helps preserve useful water shedding.
Before covering, confirm:
- Seams feel dry. Press a clean towel against piping and stitching; it shouldn't pick up moisture.
- Undersides are exposed and checked. Feel cushion backs and inspect the supports they sit on.
- Compartments contain no pooled water. Check corners, liners, and drainage channels.
- Foam isn't releasing water. Gentle pressure shouldn't produce dampness at openings.
- Ventilation remains available. The cover shouldn't seal damp air inside.
- Leaks have been addressed. Don't put dry upholstery back beneath an active drip.
These habits help preserve vinyl color and grain, but they can't reverse age-related brittleness or repair a failed canvas coating.
Deciding When to Hire a Professional Boat Detailer
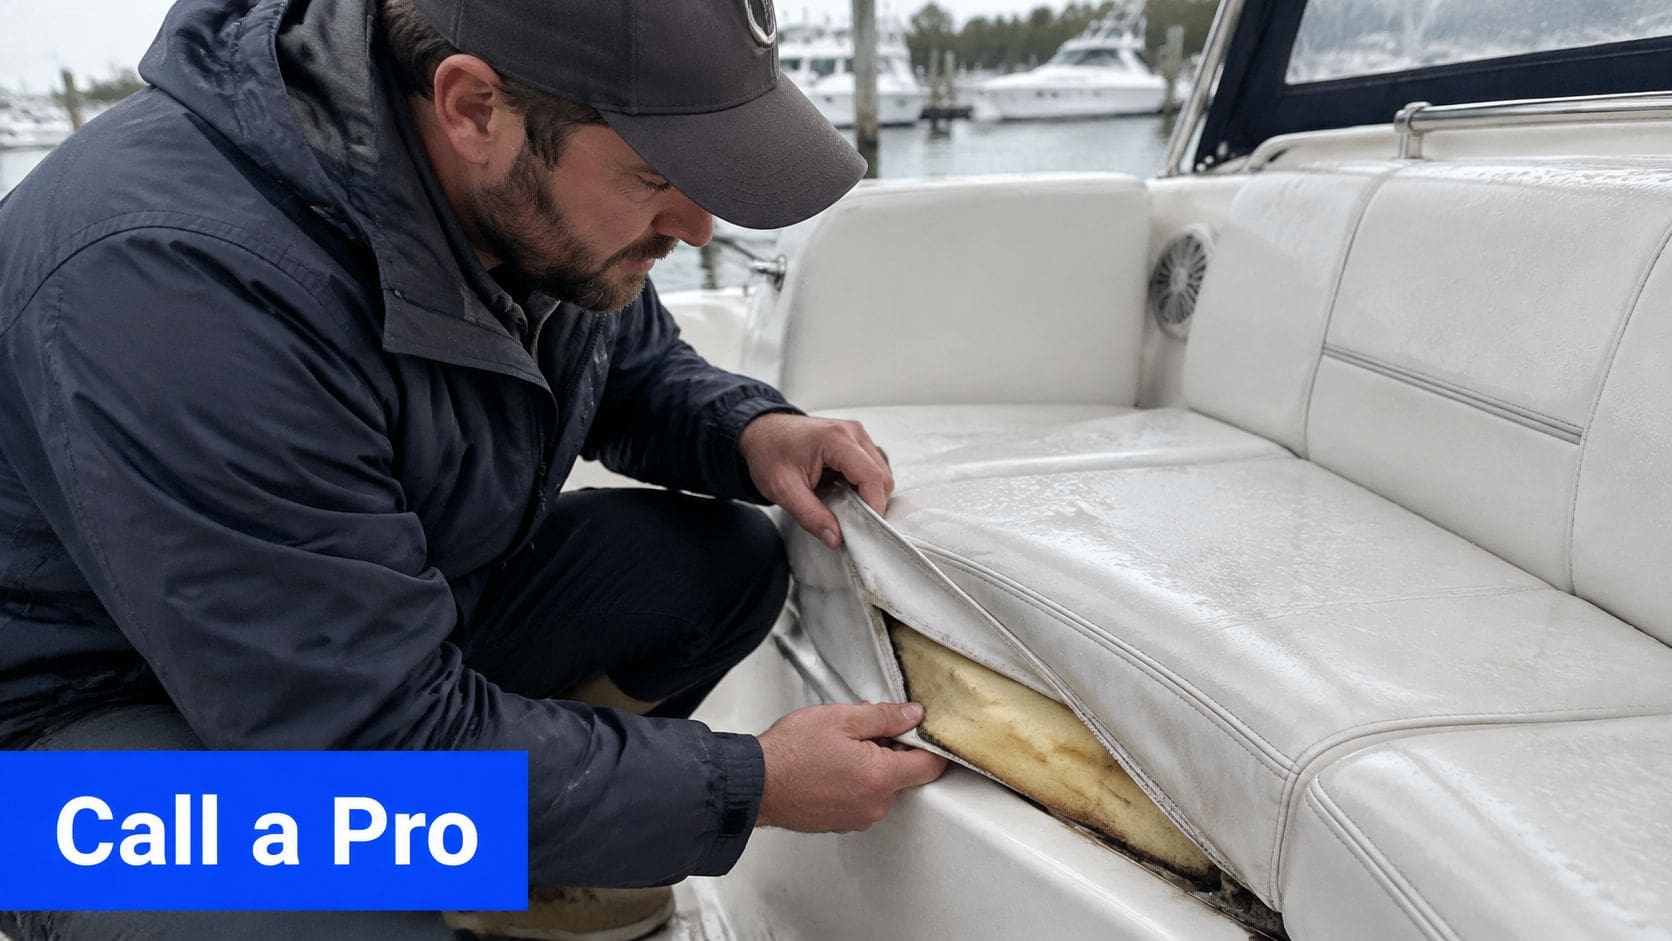
A cushion that stays damp or keeps showing mildew needs more than another round of scrubbing. Start with the material and the condition underneath: routine soil and small areas of surface mildew on sound vinyl are reasonable DIY jobs, while trapped moisture, fragile upholstery, or recurring contamination may call for professional assessment.
Use Condition to Make the Decision
- Handle routine maintenance yourself. Light grime and fresh spills on intact surfaces usually respond to careful hand cleaning.
- Get an assessment when materials stay wet. EPA guidance on mold remediation says porous materials that remain wet for more than 48 hours may need professional evaluation or disposal.
- Investigate stains that return. If careful treatment followed by complete drying doesn't resolve the problem, check for moisture inside the cushion or beneath the upholstery instead of increasing chemical strength.
- Call an upholstery specialist for physical damage. Tears, open seams, crumbling foam, and brittle vinyl need repair assessment, not stronger cleaner.
- Consider seasonal help for larger jobs. Extensive seating, enclosed cabin upholstery, or an unexplained storage odor can make a pre-season deep clean useful.
A detailer may remove embedded surface soil, extract accessible moisture, and identify areas that need repair. Cleaning can't restore rotten foam or replace a worn protective finish, and old mildew stains may remain.
Compare the Scope, Not Just the Price
When comparing professional boat-detailing costs, ask whether the quote covers cushion undersides, compartments, stain treatment, extraction, and a plan for drying. A surface wipe alone won't address moisture held in a cushion assembly.
Lionheart Detailing serves greater Columbus from its Hilliard shop and offers mobile service at driveway or workplace locations where access permits. Its fully equipped mobile van carries water and power. Confirm the boat's size, access, and requested work before booking.
If you're also considering ceramic coating services, separate hull protection from upholstery care. A suitable marine coating may protect compatible hull surfaces; it won't treat fabric or wet cushion foam.
Shop location: 4402 Weaver Court North, Suite 204, Hilliard.
Lionheart Detailing offers professional detailing, ceramic coating, and paint protection film, with boat care focused on cleaning and protecting compatible materials. If you're unsure whether upholstery needs cleaning, drying, or replacement, contact Lionheart Detailing to discuss its condition and arrange an appropriate service.