You wash the car, dry it carefully, step back, and it looks great. Then the sun hits the hood and suddenly the paint looks full of spiderwebs. That's the moment the problem reveals itself as swirl marks, not “just a little haze.”
If you're searching for how to remove car swirl marks, the honest answer is that some defects are very manageable at home and some are not. That's where people get frustrated. A bottle that promises to “erase scratches” usually hides the problem for a while or improves it slightly, but true swirl removal means leveling the clear coat safely so light reflects evenly again. That's real paint correction, and it takes patience, clean tools, and the right technique.
Around Hilliard and Columbus, I talk to a lot of owners who are just getting into detailing, ceramic coatings, or paint protection. Many have never had professional correction done before. They just know their black SUV, gray sedan, or weekend car looks dull in direct light. This guide is for that person. It's practical, honest, and built around what works, what wastes time, and what can go wrong if you rush.
Table of Contents
- Why Your Perfect Car Has Spiderwebs in the Sun
- Diagnosing Your Paint Before You Touch It
- Your Toolkit for Safe and Effective Swirl Removal
- The Professional Paint Correction Process Step-by-Step
- Special Considerations for Black and Dark-Colored Cars
- Protecting Your Hard Work and When to Call a Pro
Why Your Perfect Car Has Spiderwebs in the Sun
Swirl marks usually don't show up under cloudy skies or in a garage. They show up when direct light hits the panel and every tiny scratch starts scattering that light back at you. That's why a car can look clean from a distance and still look beat up in the sun.
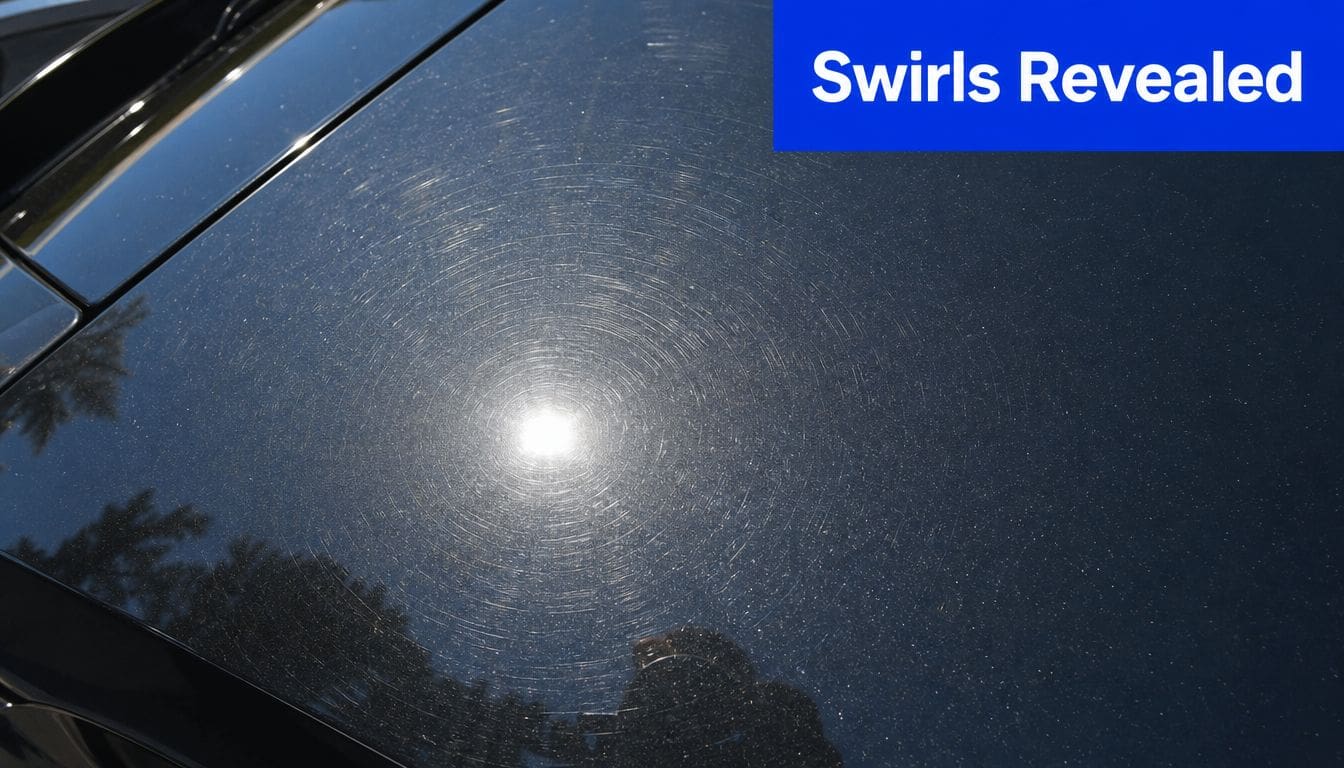
Most of the time, the cause isn't some major event. It's regular washing and drying done with contaminated tools, rushed technique, or an automatic wash with abrasive brushes. Chemical Guys notes that swirl marks are primarily caused by improper washing and drying, and that the two-bucket method with grit guards is the most effective preventative measure. The same guidance also points out that circular washing motions are a major cause, while straight-line overlapping passes help reduce visible marking, as outlined in this swirl mark washing guide from Chemical Guys.
What swirl marks actually are
They're fine scratches and haze in the clear coat. The paint color underneath may still be perfectly fine, but the top clear layer has been marred enough that reflections break apart instead of looking sharp.
That's also why wax alone doesn't permanently fix the issue. A wax or sealant can make paint look richer and hide some minor defects for a while, but it doesn't remove the uneven clear coat that causes the marks in the first place.
Practical rule: If the paint only looks bad in direct light, you're usually dealing with clear coat defects, not a dead paint job.
The common mistakes that keep adding swirls
A lot of beginners make the same handful of mistakes:
- Using one bucket: Dirt stays in the wash water and goes right back onto the mitt.
- Drying with low-quality towels: Cheap or worn towels drag debris instead of pulling it away from the surface.
- Using circular motions: Those arcs become the pattern you later see in sunlight.
- Going through brush washes: Those brushes touch hundreds of dirty vehicles and then touch yours.
- Trying to polish a dirty surface: Any bonded contamination still on the panel can create more marks during correction.
If you're in Hilliard, Dublin, or anywhere in the Columbus area and your car has that spiderweb look, don't assume the paint is ruined. In many cases, the finish can be improved dramatically. But the process has to be clean, controlled, and realistic from the start.
Diagnosing Your Paint Before You Touch It
Before you grab a compound or polisher, inspect the paint. This step saves people from two expensive mistakes. The first is buying products they don't need. The second is getting aggressive on damage that polishing won't fully remove.
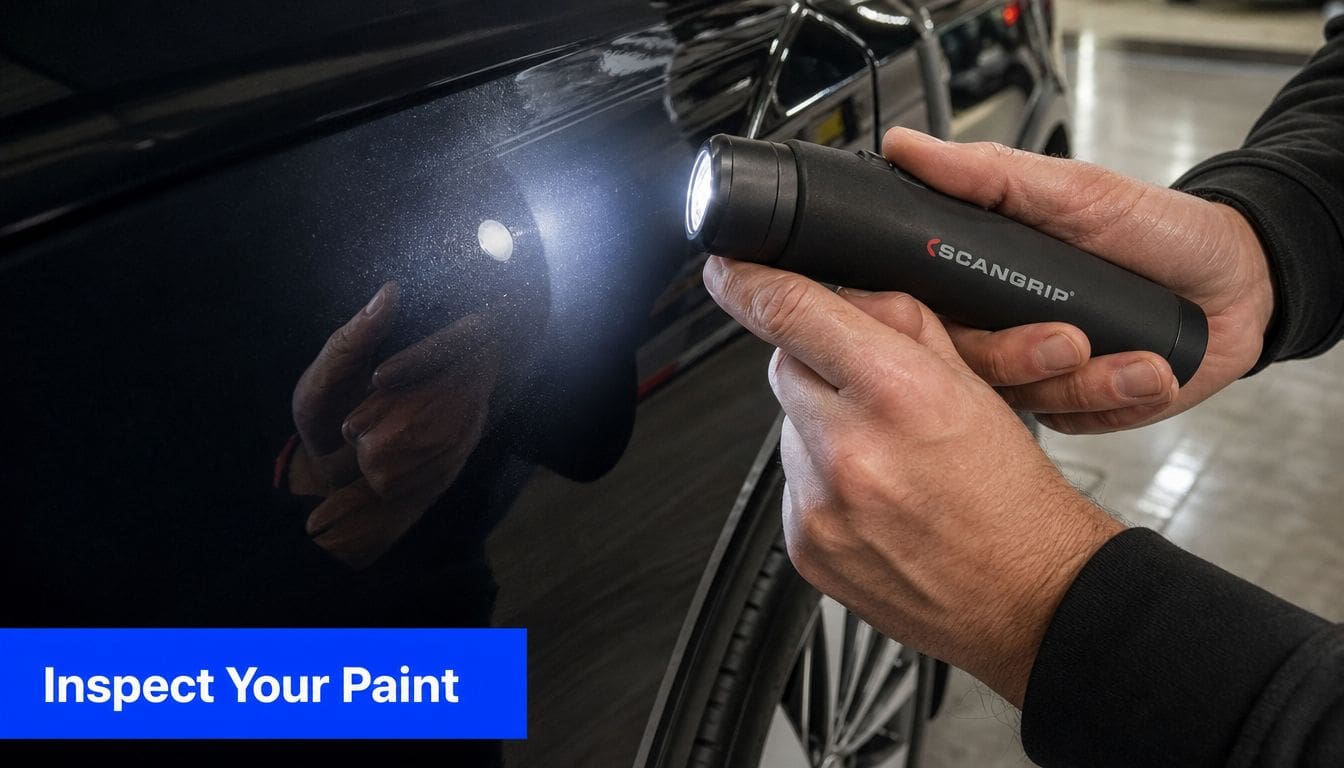
Use the flashlight test first
Park the car inside or in shade. Then use a strong LED light and inspect one panel at a time. Move the light around and change your angle. You're looking for how the defects react when the beam hits them directly.
Light, uniform swirl marks usually appear as a general web or haze. They tend to be spread across the panel and often come from washing. Those are the defects a patient DIY owner can often improve.
Use this simple process:
- Wash and dry the area first: Dirt hides the true condition.
- Hold the light close to the paint: Don't inspect from several feet away.
- View from multiple angles: Some defects disappear from one angle and show strongly from another.
- Check panel by panel: Hood, trunk lid, upper doors, and black trim-adjacent areas usually tell the story fastest.
Know the difference between swirls and deeper damage
Random isolated deeper scratches look different. They're more singular, more defined, and they don't blend into the general haze pattern. These are often what people call “one bad scratch,” even if the car also has normal swirls.
A quick fingernail test helps. Very lightly move your nail across the scratch. If your nail catches clearly, don't assume polish will remove it safely. At that point, improvement may still be possible, but full removal may require more aggressive correction or a different repair path.
If a scratch catches your nail, treat it like a limit marker, not a challenge.
That's one reason professional inspections matter. A trained detailer isn't just looking for visible defects. They're deciding what can be improved safely. If you want to see what a dedicated correction service involves, take a look at professional paint correction options.
Set realistic expectations before you polish
Here's the honest version most beginners need to hear:
- Light wash marring: Often very improvable at home.
- Moderate swirls on daily drivers: Usually machine polishing territory.
- Deeper isolated scratches: Often reducible, not always removable.
- Damage through the clear coat: Polishing won't rebuild missing material.
If you diagnose correctly, the rest of the process gets easier. You stop chasing perfection where it isn't safe, and you start working toward the best finish the paint can reasonably give you.
Your Toolkit for Safe and Effective Swirl Removal
The right tool kit decides whether swirl removal feels controlled or turns into guesswork. I see this a lot on dark cars around Hilliard. The owner buys a polish first, then finds out the towel, pad, or wash method caused half the problem.
A safe setup does two jobs. It keeps fresh defects from being added, and it gives you enough cut to improve the paint without getting aggressive for no reason. That balance matters even more on black and other dark colors, where every missed wipe and every weak finishing step tends to show.
The prep tools that matter most
Good correction starts with wash and decontamination tools that reduce contact damage and leave the paint clean enough to polish safely.
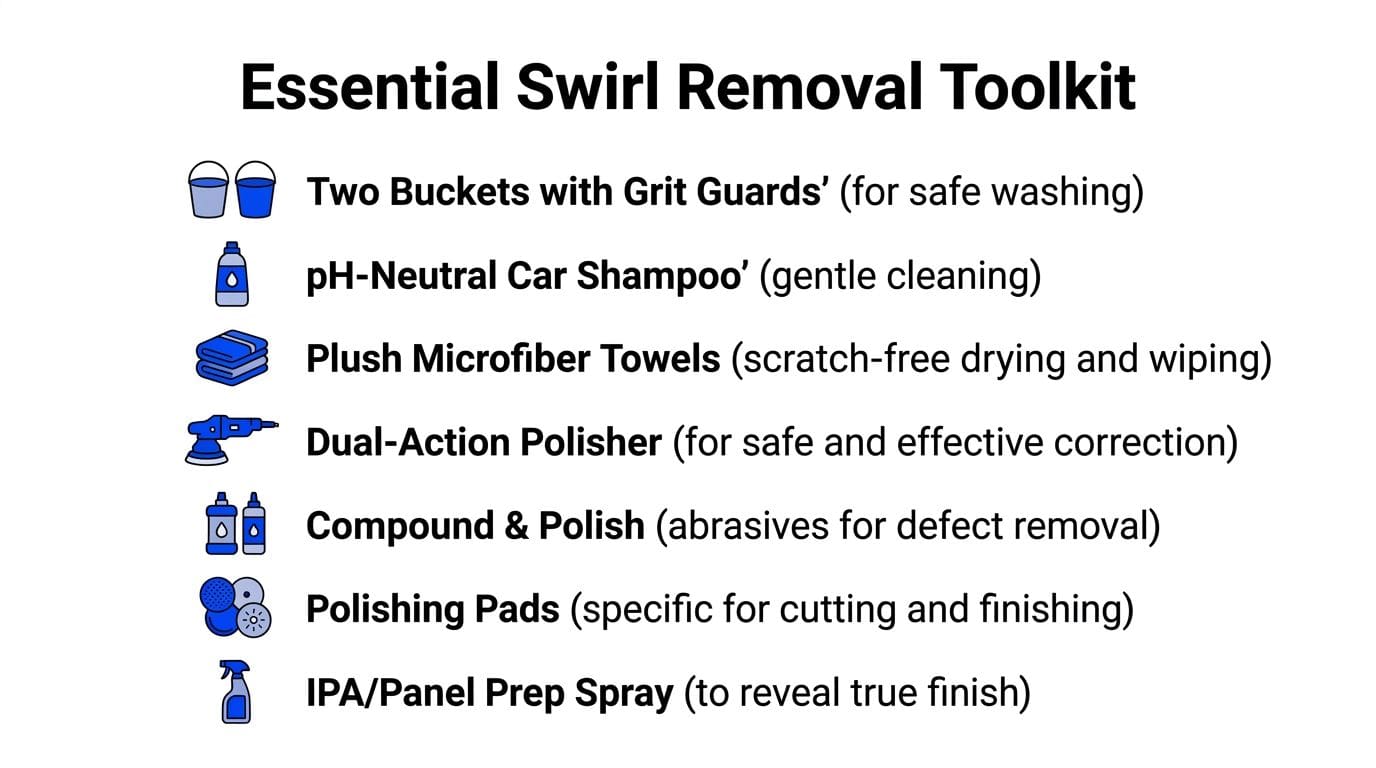
- Two buckets with grit guards: One holds your soap solution. One holds rinse water so more dirt drops below the mitt.
- pH-neutral car shampoo: Strong cleaners can strip protection and dry out trim without giving you better swirl removal.
- Quality wash mitts: A soft microfiber or wool-style mitt is safer than an old sponge that drags grit across the surface.
- Plush microfiber drying towels: Drying is a common place to install fresh swirls, especially on soft black paint.
- Clay bar or clay mitt with lubricant: Use this only after washing. It removes bonded contamination that can interfere with polishing.
- Painter's tape: Tape off trim, badges, edges, and delicate areas so residue and pad contact stay where you want them.
- IPA or panel prep spray: This strips polishing oils so you can check the actual result instead of a temporarily filled finish.
- Strong inspection lighting: Sunlight is great, but a handheld LED helps you catch haze, patchy correction, and leftover defects indoors.
Hand polishing vs machine polishing
Here's the honest split. Hand polishing can improve light wash marring, small spots, and isolated areas where a machine is awkward. It is slow, physically tiring, and limited once defects move past the mild stage.
A dual-action polisher is the practical choice for full-panel swirl removal. It cuts more evenly, finishes more consistently, and gives a realistic shot at correcting moderate defects without the risk level of a rotary in inexperienced hands. It still takes practice. Pad choice, arm speed, pressure, and product amount all matter.
| Factor | Hand Polishing | Machine Polishing (DA) |
|---|---|---|
| Correction ability | Best for light haze and minor swirls | Better for light to moderate swirls and more uniform correction |
| Time required | Slow, especially on larger vehicles | Faster once technique is learned |
| Learning curve | Easier to start | Takes practice, but more consistent |
| Risk level | Lower cutting power, but still possible to mar paint with poor prep | Safer than rotary for beginners, but technique still matters |
| Physical effort | High | Moderate |
| Finish quality | Good for spot work and mild improvement | Better for full-panel clarity and gloss |
For beginners, the smart move is usually a DA polisher, one cutting pad, one finishing pad, a compound, and a finishing polish. Keep the setup simple. More products do not automatically mean better results. If you are trying to decide between a lighter correction and a more involved process, this breakdown of one-step vs two-step paint correction helps set expectations before you buy anything.
What professionals use differently
The biggest difference is not a secret product. It is restraint.
Pros test a small section first, adjust pad and polish based on what the paint does, then repeat that combination across the car only if it gives the result safely. On black paint, that often means chasing the best finish, not the most cut. A heavy pad and compound can remove defects fast but leave haze that looks worse in the sun than the original swirls.
If you are polishing by hand, use a dedicated foam or microfiber applicator and expect improvement, not perfection. If you are using a DA, keep pads clean, work small sections, and stop once the paint reaches your target. Clear coat is limited. You do not get bonus points for removing more of it than needed.
Lionheart Detailing offers multi-stage paint correction for owners who would rather have that process handled professionally, especially on darker paint where the margin for error gets tight. If your long-term plan includes ceramic coating, get the finish right first. Coating locks in whatever is underneath, including haze, missed swirls, and towel marks.
The Professional Paint Correction Process Step-by-Step
Pull a dark car into the sun after a quick driveway polish and the paint can look worse than it did in the garage. The swirls may be lighter, but now there is haze, uneven gloss, or fresh towel marks. A professional process is built to prevent that. The order matters, and so does knowing when to stop.
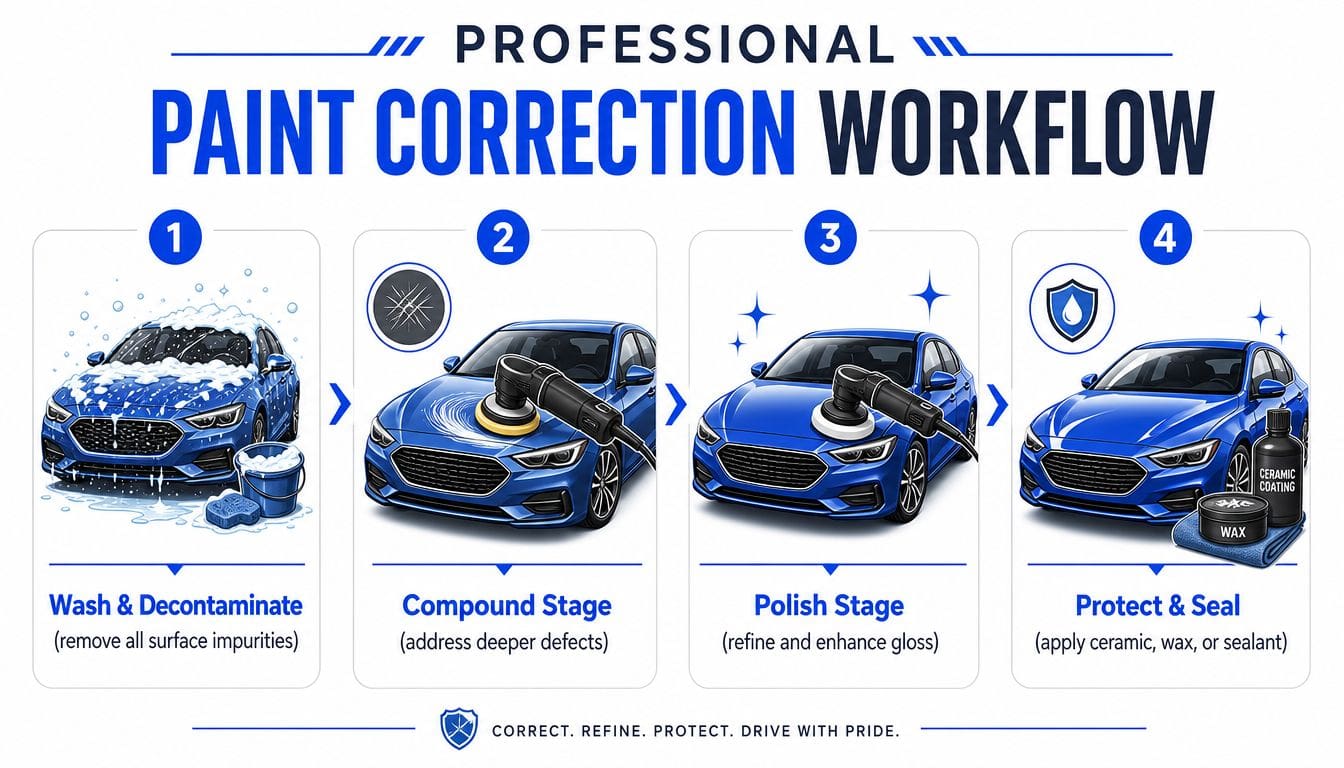
Wash and decontaminate first
Polishing dirty paint is how people grind contamination into the clear coat. Start with a thorough wash, rinse well, and dry with clean microfiber towels. Then remove bonded contamination with clay or a clay substitute so the pad is working paint, not rail dust and grit.
Pros do this step because correction only works on a clean surface. If the paint still feels rough after washing, it is not ready for a machine.
Tape trim and choose a test spot
Tape off textured trim, badges, edges, and any area that could stain or catch a pad. This only takes a few minutes and can save a lot of cleanup or repaint work.
Then test one small section before touching the rest of the car. I usually pick an area with typical defects, not the worst spot on the vehicle. The goal is to find the least aggressive pad and polish combo that gets the result you want safely. On softer paint, that may be a polish and polishing pad. On harder paint, it may take a stronger first step and a separate refining pass.
A test spot answers three practical questions:
- How much defect removal is realistic
- Whether your combo finishes cleanly or leaves haze
- If the job is shaping up as a one-step improvement or a two-step correction
If you are still deciding between those two paths, this breakdown of one-step vs two-step paint correction helps set expectations.
Here's a helpful walk-through video if you like seeing machine movement and pad work in action.
Polish in small sections and move slowly
This is the part that separates decent DIY work from clean, repeatable correction. Work a small area. Keep the pad flat. Make slow, overlapping passes so the abrasives can do their job evenly.
Auto Finesse recommends covering a section about nine times the size of your pad and moving at roughly one inch per second in its swirl mark polishing technique guide. That lines up with what works in the shop. Large sections and fast arm speed usually leave defects behind and heat the panel without improving the finish.
Keep the process controlled:
- Prime the pad lightly.
- Spread product over a small section.
- Use overlapping passes in a cross-hatch pattern.
- Watch the pad. Clean it before it gets caked with residue.
- Check your work before adding another set.
By hand, expect visible improvement, not full correction. With a DA polisher, you can get much farther, but the risk also goes up. Black and other dark colors make every mistake easier to see, especially if the pad is dirty or the polish is too aggressive for the finish you want.
Wipe down and inspect honestly
After each section, wipe off residue with a clean microfiber towel and inspect the panel without guessing. A panel wipe helps remove polishing oils so you can see the true finish instead of a temporary gloss boost.
If the swirls are reduced and the paint still looks clear, your combo is close. If the defects are gone but the finish looks cloudy, add a refining step with a softer pad and finer polish. If almost nothing changed, step up carefully. More cut is sometimes necessary, but every stronger move trades a little more clear coat for a little more correction.
That trade-off matters. Safe, repeatable improvement is the target for most owners. Chasing perfect results on every panel is how beginners turn light swirls into haze, edge burn, or a finish that only looks good under garage lights.
Special Considerations for Black and Dark-Colored Cars
Black paint exposes bad technique faster than any other color. Dark blue, deep gray, and other very dark finishes aren't far behind. If you own one, you already know the pattern. It looks amazing when it's right and unforgiving when it's not.
Why dark paint is less forgiving
Verified color-specific data states that black paint has 2.3x higher visibility of micro-marring post-polish due to light absorption, and that many owners over-compound in response and thin clear coats beyond safe thresholds, as discussed in this black paint correction thread.
That matches what detailers see in practice. On black paint, even a small amount of pad haze or faint micro-marring can stand out hard in direct light. The correction itself may remove the obvious swirls, but if the finishing step isn't dialed in, the surface can still look cloudy or slightly ticked up.
How to adjust your process
Dark paint rewards restraint.
- Use the least aggressive combo that works: Don't jump straight to heavy cut unless the paint really needs it.
- Refine after your cut: A finishing step matters more on black than many beginners expect.
- Keep pads cleaner: A dirty pad can add haze fast on dark panels.
- Inspect constantly: What looks “good enough” in a garage may not hold up outdoors.
- Consider tool choice carefully: The same verified source notes that dual-action polishers with smaller offsets can reduce black-paint micro-marring compared with more universal beginner setups.
If you drive a black vehicle and you're also considering Columbus PPF or Hilliard paint protection film, this is one reason prep matters so much. Protection films and coatings preserve appearance. They don't correct an under-finished panel after the fact.
On dark cars, the biggest rookie mistake isn't failing to remove enough. It's trying to remove too much.
Protecting Your Hard Work and When to Call a Pro
You finish polishing, pull the car into the sun, and the paint finally looks clean and sharp. Then the next bad wash puts fresh towel marks right back into it. That is the part many swirl-removal guides skip. Correction is only half the job. Keeping the finish that way is what saves your time and money.
Freshly polished paint should be protected soon after correction. Wax, sealant, and ceramic coating all have a place. The right choice depends on how the car is used, how often it gets washed, whether it lives outside, and how much upkeep you are willing to do yourself.
Wax is fine for someone who enjoys regular upkeep and wants a simple, lower-cost option. Sealants usually last longer and hold up better on a daily driver. Ceramic coatings make washing easier and help the surface stay cleaner, but they still require proper technique. They do not stop rock chips, and they do not make black paint immune to wash marring. If you already have a coated vehicle, proper upkeep matters just as much as the install. This guide on how to maintain ceramic coating properly is a good place to start.

Professional correction makes more sense when the risk of making the paint worse starts to outweigh the savings of doing it yourself. That line shows up faster on black and dark-colored cars. They reveal haze, leftover micro-marring, and poor wipe-down technique in a way silver and white often hide.
Call a pro when:
- The paint has deeper isolated scratches: Some defects can be softened safely. Others are too deep to chase without removing too much clear.
- The car is black or very dark: These colors need a cleaner finishing step, better lighting, and more restraint.
- You want a coating afterward: The coating will lock in whatever is under it, good or bad.
- You do not have the tools, lighting, or workspace: Machine polishing in direct sun, wind, or a dusty driveway is harder than many beginners expect.
- You want a high-level finish: Hand polishing can help light marks, but it usually will not match a properly tuned machine correction.
This is the honest middle ground. A careful DIY owner can improve light wash marring, especially on a daily driver where perfection is not the goal. Heavier defects, softer paint, and dark finishes are where professional judgment starts to matter more than product choice. Knowing when to stop is part of good correction.
If you are looking for Hilliard auto detailing, ceramic coating near me, or help deciding between paint correction, coating, and Hilliard paint protection film, match the service to the vehicle and to your expectations. A commuter may only need a one-step polish and protection. A dark-colored weekend car may need a slower, more controlled correction plan to finish cleanly.
If your paint has swirl marks and you'd rather get a straight answer than a sales pitch, contact Lionheart Detailing. We help owners around Hilliard and the greater Columbus area with paint correction, ceramic coating, paint protection film, and full detailing, and we're happy to tell you what can realistically be improved and what makes the most sense for your car.